Showing posts with label Painting. Show all posts

Monday, 15 October 2012

Alchemy's Workbench #6: Laying Down The Velvet Gauntlet

Here's one they made earlier.
As well as the terrain that I am currently painting up for a friend, he has also handed me several of his other unpainted miniatures to work my magic on. One of which is this challenging little number from Games Workshop.

A quick search of their website soon turned up an image of what the finished project might look like and, it's interesting to see that they went with much the same color scheme that I had imagined (I had to guess as the box has long since gone missing).

Whilst in all honesty I have to admit that the shape and form of this model isn't exactly my cup of tea (it's lacking a certain something that I can't quite lay my finger on) it should prove to be quite interesting to paint as it should require nothing more than basic techniques to achieve what you see above, which is admittedly a rather nice overall finish.

Looking forward to this one but, it'll be some time before I get around to this one I imagine as I still have a handful of terrain to do, 35ish 20mm undead, a handful of 20mm adventurers, a not so 20mm troll and, potentially some more terrain to paint up beforehand!

Not to mention all the other models that I have my eye on...

Thursday, 11 October 2012

Several Shades Of Grey


 The first photo shoot of a few finished terrain pieces painted for a friend. I have to say that I am quite happy with how well they have come out considering that I have never painted anything like this before.

What do you think? Any feedback, tips and, advice would be most welcome. Pats on the back wouldn't go a miss either. ;0).

Oh, and sorry about the poor resolution guys. I had to shrink the images to account for the fact that they were taken with a 2.0 mega-pixel camera, under an incandescent light and, no flash. 

Cyborkz - Resistanz Iz Futile

Who wouldn't want to add a few Borg to there miniatures collection?

The trouble is though that if you do want to, there just aren't any good Borg miniatures readily available. In fact, I'm not sure there are any "out of the box" Borg available full-stop. Of course, I could be wrong but, I can't find them!

So, what's a modeler to do? Assimilate of course! ;0).

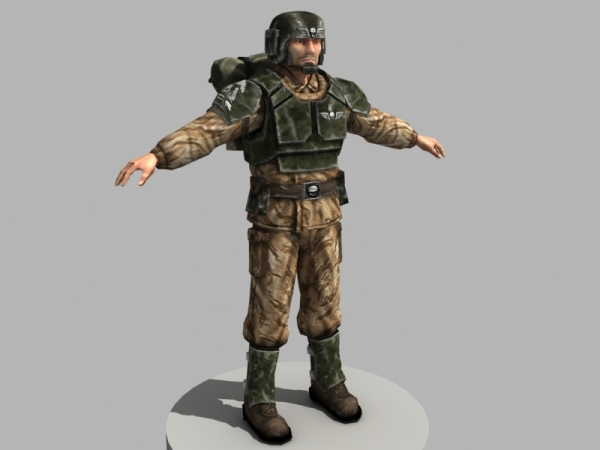
My first thoughts on going custom were that Cadian Shock Troops would make a pretty good starting point for any Borg model. I'd need new heads and probably a few servitor arms from other models but the end result should be pretty close.. Or so I thought.

Then I found this picture on-line:

Click to enlarge.

Whilst the Cadians would do a fine job representing labor and transport drones, the arms would need some serious modification for every other type. The Games Workshop servitor arms just weren't going to cut it.

Not particularly practical from a personal point of view as I have none of the parts in my bit box nor anything to mod them with, meaning that this idea could quickly turn into a cash sink.. But looking in my bits box did give me a brainwave.

I have 40 or so Marauders from Mantic. Orks, that straight out of the box have a very Borg look about them. At one point I was even going to convert several of these to Mech Boyz for 40k. So, these would seem to be the perfect low-cost option for the project at hand. After all, the Borg didn't just assimilate Terrans did they?

So, depending on how well this pans out, I may even produce an unofficial codex for them. Not that Games Workshop will ever let you bring them to their gaming table... You can always use the paint scheme and ideas though, bringing cybernetically  enhanced Orkish killing machines to a workshop gaming table near you.

Tuesday, 4 September 2012

Necrons: The Lazy Man's Force

Imagine this but, more awesome!
When it comes to starting up in the Warhammer: 40,000 hobby the first major choice that you face is which army to field.

It's obviously important to choose a force that appeals to you but, what often gets overlooked by newer players is just how manageable is that force?

For example, the idea of playing as Orks may appeal to you but, are you prepared for just how many models you are going to have to assemble and paint?

Let's face it, it's not uncommon for new players to throw in the towel half way through painting up, what is a small army but a hell of a lot of models. So, to save wasting money if for no other reason, it's important to choose your army wisely based on your abilities and level of patience (and I can be quite impatient!)

The chances are that if you're reading this, you're quite impatient too. So what do i suggest?

Necrons. Necrons all the way! But why?

Well, for a start Necrons have always seemed to have an edge over all of the other armies from the word go, so if winning is important to you, choose Necrons but, that's probably a topic for another post.

What we're interested in here is the fact of just how fast you can get that bulk of a Necron army to the table, and when I say fast, I'm talking in hours, not days, to the point where it is conceivable to have the better part of a Battleforce rendered to a good tabletop standard within a day!

Something that I consider unthinkable with most other armies.

This is made possible by just how little you can get away with and, how many lazy mans tricks you can pull to get you there quickly. You thought Black Templars where a cinch, you haven't seen anything anything yet!

All you have to do is follow these few simple steps and you'll be rising out of the sand with the best of them:

Step 1: Prime your models.. Spray them black.
Step 2: Paint them all with a quick coat of watered down chainmail or boltgun.

This is a personal shortcut of mine. Metallic paints don't mix well with water as you may know, so the end result of applying this mixture will produce much the same effect as if you had painted the model silver and washed it black... Just in one step, saving you time and saving you money!

Step 3: Whilst your models are drying, paint their bases brown.
Step 4: Once your models are dry you may want to wash a little black into the deep recesses but, this is totally optional.
Step 5: Detailing. Pick out the chest emblem and eyes with a touch of green to compliment the Gauss Rifle and, optionally the piece of cabling on the rifle itself.
Step 6: Assemble the model.
Step 7: Base the model with sand and you're done!

All in all, that should take you about an hour and a half for a ten man squad the first time around, which should get quicker as you get into the flow of things. You can also apply similar methods to your other models, switching the green for red with the scarabs for detailing and, possibly line-edging your larger models.

Be warned though, line-edging takes time (lots of time if you want to get it right) so be sure to make it one of the last things you do to bring your models from tabletop - good, to tabletop - awesome. For a lazy mans approach however, this simple guide should see you well on the way to marching across scorching deserts and apocalyptic wastelands.